Refurbished the mailbox
Today's DIY job was to refurbish our mailbox. Yes, I know, I could have just gone and bought one, but I wanted to save some money. Not sure if I did, but I had a lot of fun nonetheless. Unfortunately, I didn't get any "before" photos. Just didn't even think about it when I started the job.
The mailbox was a faded green color and had some rust holes in the bottom of it. Also, the wood that it mounted to was rotten. So, I pulled out the old screws and dismounted it from the rotten board. I cut a new piece, sanded it enough to open the grain a bit, sealed it with Thompson's water seal, drilled some pilot holes for the new screws.
I used a wire wheel and my Ryobi drill to clean out most of the rust--certainly the most rusty parts, esp. around the holes. I had purchased some Devcon metal patch and filler from Amazon, and I cut little strips of flashing metal to cover the holes from the bottom. I used the Devcon to bond the patches to the bottom of the mailbox. Since the patches are on the bottom and will not be seen because of the mounting board, I wasn't too concerned about making it pretty. It's doesn't look all that bad, and I suspect that it will hold up just fine.
Once the set up a bit, I gave the whole thing a light sanding, and then sprayed several coats of gloss black primer + finish enamel paint. Honestly, I think it looks great--at the very least, it looks much, much better than it did!
Oh, I should mention that before I painted, I pulled all of the plastic bits off: the handle parts and the flag. I used some WD-40 to clean and polish them (yes, you can use WD-40 to polish plastic parts); it even renews color (to an extent). Also, I should mention that a miracle occurred during this DIY project: I had everything I needed and did not need to make any trips to the hardware store!!
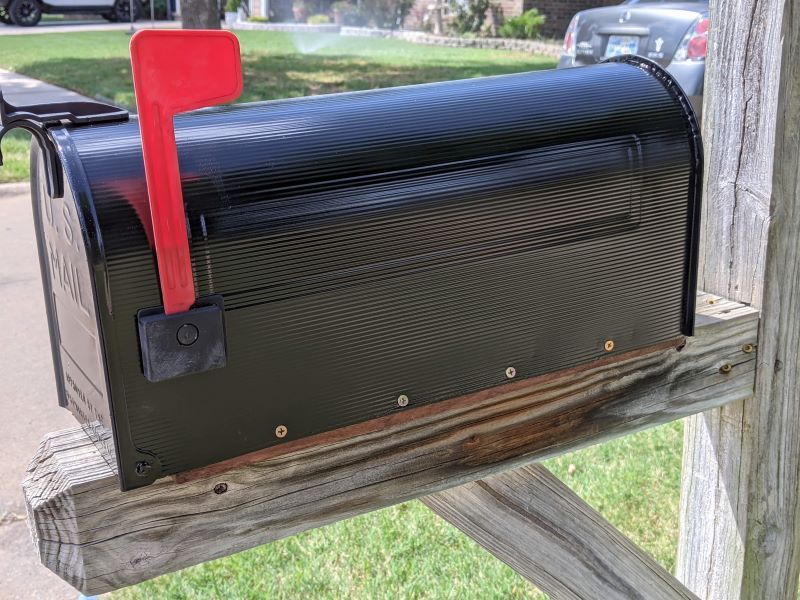
Here's a shot of the finished product: